What is Rust?
Rust is a systems programming language that emerged from Mozilla Research in 2010 to solve a fundamental problem: how do you write fast, low-level code without sacrificing safety?
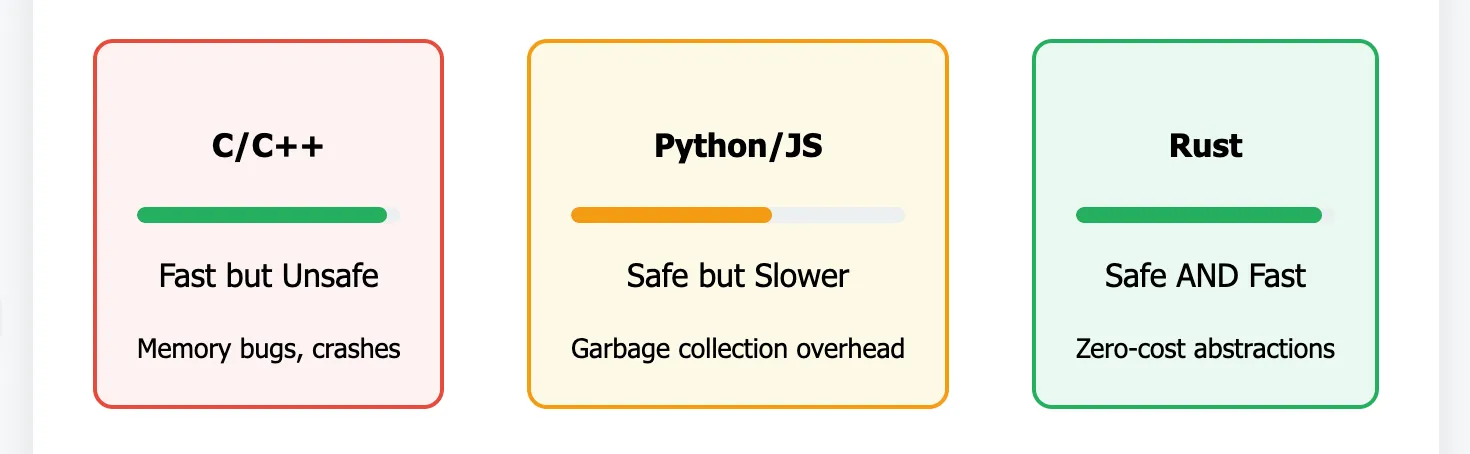
Traditional systems languages like C and C++ offer great performance but are very prone to memory-related bugs—crashes, security vulnerabilities, and data races that even experienced developers struggle with. High-level languages like Python and JavaScript solve safety through garbage collection (automatic memory management), but this comes with performance costs and unpredictable pauses.
Rust became the language of choice for many things, ranging from low-level system development, web compiler development, and cool stuff like Smart contracts development for Web3 protocols like Solana.
However, developers coming from languages like JavaScript, Python, or even Solidity often find Rust's syntax both intriguing and intimidating. In this guide, we will see an introduction to Rust from one developer that has been in a similar situation to other developers.
Why Rust Feels Different
Rust was designed with three core principles: safety, speed, and concurrency. These design decisions have then become a massive influence on the syntax, prioritizing explicitness over simplicity.
Unlike garbage-collected languages, Rust manages memory through a sophisticated ownership system that prevents common bugs like null pointer dereferences and memory leaks, all at compile time. A lot of things in Rust tend to be manual, and this tends to show significant advantages in, say, financial systems, systems programming, developing things like Operating systems, and many more.
Now let’s explore Rust’s syntax with some fundamental concepts that we need to get familiar as a Rust beginner.
Rust’s unusual syntax
Rust’s syntax has a somewhat weirdness to it. If you have some experience with low-level languages like C++, C or even Java, it may feel like nirvana to write Rust.
If you were like me and your experience was just a lot of TypeScript, JavaScript, Python, and little to no Java, then the list below may bring some really new things (although most of them are Rust-specific and not general programming concepts).
Let’s dive into some of the many unique syntactic components of Rust:
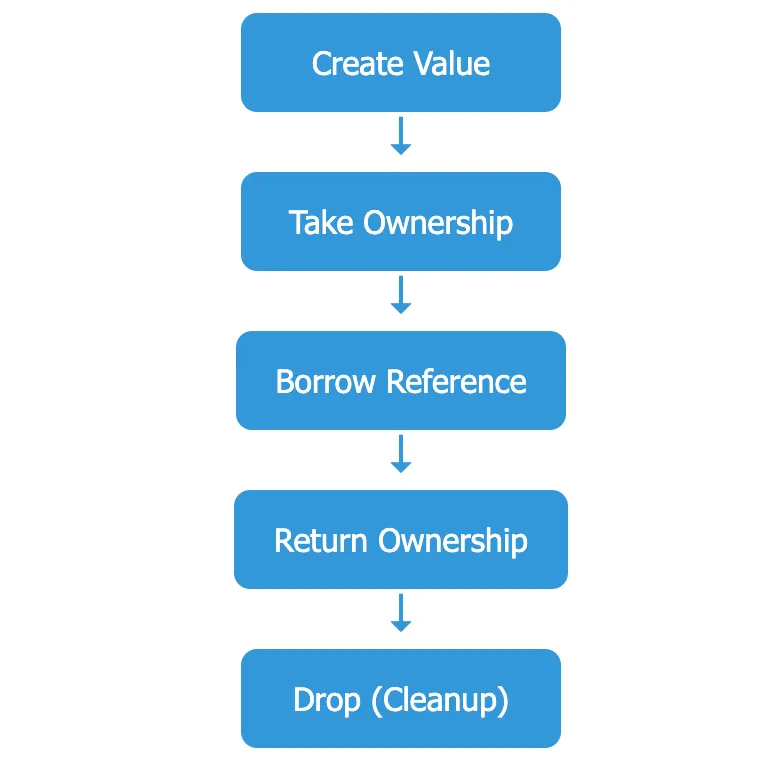
- The Ownership System:
&,mut, and Beyond
fn main() {
    let name = String::from("Alice");           // Owned value
    let name_ref = &name;                       // Immutable reference

    let mut age = 25;                           // Mutable variable
    let age_ref = &mut age;                     // Mutable reference
    *age_ref += 1;                              // Dereferencing to modify

    println!("Name: {}, Age: {}", name, age);
}
The & symbol in the code above creates references (borrowing), while mut explicitly marks mutability. This explicitness prevents many runtime errors by catching issues at compile time.
- Pattern Matching with
match
Rust's match expression is far more powerful than traditional switch statements:
fn describe_number(n: i32) -> &'static str {
    // pattern matcher setup
    match n {
        0 => "zero",
        1..=5 => "small positive",
        -5..=-1 => "small negative",
        n if n > 100 => "large positive",
        n if n < -100 => "large negative",
        _ => "moderate number"
    }
}
Notice how match can handle ranges (1..=5), guards (n if n > 100), and catch-all patterns (_). This isn't just syntax sugar—the compiler ensures all possible cases are handled.
- Result and Option Types
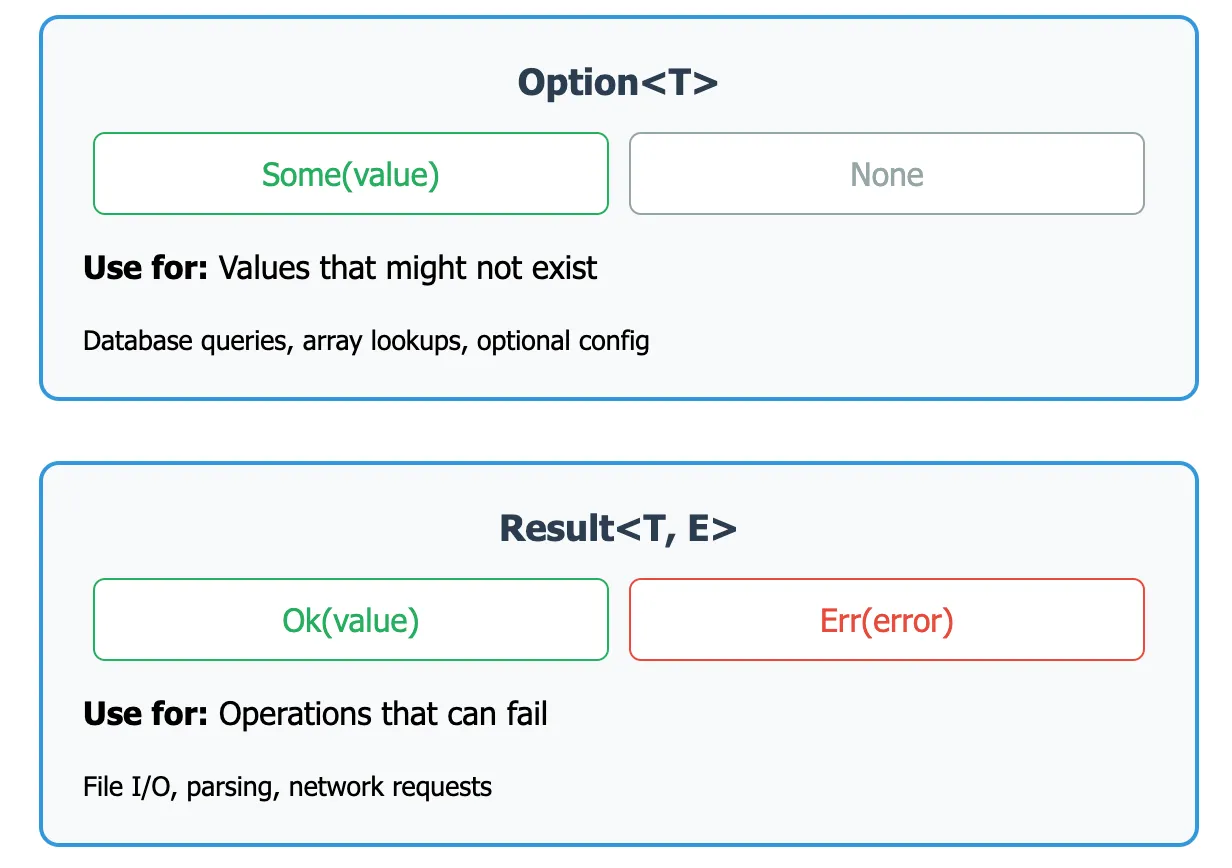
Instead of null values or exceptions, Rust uses Option<T> and Result<T, E> to handle potentially missing values and errors safely:
Option - Handling Potentially Missing Values
Option<T> replaces null values. It can be either Some(value) or None . Look at the code snippet below:
fn find_user(id: u32) -> Option<String> {
    if id == 1 { Some("Alice".to_string()) } else { None }
}

fn main() {
    // Pattern matching
    match find_user(1) {
        Some(name) => println!("Found: {}", name),
        None => println!("Not found"),
    }

    // Using defaults and chaining
    let user = find_user(999).unwrap_or("Guest".to_string());
    let name_len = find_user(1).map(|name| name.len()).unwrap_or(0);
}
Result - Handling Operations That Can Fail
Result<T, E> is used for operations that can fail. It can be either Ok(value) or Err(error):
fn divide(a: f64, b: f64) -> Result<f64, String> {
    if b == 0.0 {
        Err("Cannot divide by zero".to_string())
    } else {
        Ok(a / b)
    }
}

fn main() {
    // Pattern matching
    match divide(10.0, 2.0) {
        Ok(result) => println!("Result: {}", result),
        Err(error) => println!("Error: {}", error),
    }

    // Error propagation with ? - errors propagate to the calling function
    fn calculate() -> Result<f64, String> {
        let a = divide(20.0, 4.0)?;  // If this fails, calculate() returns Err immediately
        let b = divide(a, 2.0)?;     // If this fails, calculate() returns Err immediately
        Ok(b + 10.0)                 // Only reached if both divisions succeed
    }

    // Using the function that might propagate errors
    match calculate() {
        Ok(result) => println!("Final result: {}", result),
        Err(error) => println!("Calculation failed: {}", error), // Error from divide() ends up here
    }
}
Key Differences:
Option<T>: Use when a value might not exist (finding items, parsing, etc.)Result<T, E>: Use when operations might fail with specific errors (file I/O, network, parsing, etc.)
Both types force explicit handling of "failure" cases, eliminating null pointer exceptions.
- Expressions vs Statements
In Rust, almost everything is an expression that returns a value:
fn get_status(age: u32) -> &'static str {
    // This entire if-else block is an expression
    if age >= 18 {
        "adult"
    } else {
        "minor"
    }
    // Note: no semicolon on the last expression means it's returned
}

fn main() {
    let status = {
        let age = 20;
        if age >= 18 { "adult" } else { "minor" }
    }; // The entire block is an expression assigned to status

    println!("Status: {}", status);
}
Notice how we omit semicolons on the last line of blocks—this tells Rust to return that value.
Now that we've covered Rust's core syntax patterns, let's explore one of its most powerful features: macros. These aren't just fancy functions—they're code that writes code.
Understanding Function-like Macros
With a function, you have a piece of code that evaluates to something, calls on other parts of your program, or returns something.
Macros, however, operate on code itself, generating new code at compile time. In Rust, there are three types of Macros:
- Function-like macros - Look like function calls:
println!(),vec![],panic!() - Derive macros - Used with
#[derive(...)]:#[derive(Debug, Clone)] - Attribute macros - Used as attributes:
#[test],#[cfg(...)]
We only have to talk about Function-like macros for now though.
What Are Function-like Macros?
Function-like macros look like function calls but end with an exclamation mark (!). They can take many types of input and generate code based on that input.
// These are all macro calls, not function calls:
println!("Hello, world!");
vec![1, 2, 3, 4];
format!("The answer is {}", 42);
panic!("Something went wrong!");
In the next section, we look at some common examples of these Macros that are built-in into Rust already.
Common Built-in Macros
Rust is comprised of many examples of the above three types of Macros that are built-in, and they come in handy more often than not.
Below, we talk about some examples of Function-like Macros that are super useful and you will find them useful for sure:
println! and format!:
These macros handle formatted printing with compile-time format string checking:
let name = "Bob";
let age = 30;

println!("Name: {}, Age: {}", name, age);
println!("Name: {name}, Age: {age}"); // Named parameters
println!("Hex: {:#x}, Binary: {:#b}", 255, 255); // Different formats

let formatted = format!("Hello, {}!", name);
vec!
Creates vectors (think of vectors in the sense that you would think of Arrays) with initial values:
let numbers = vec![1, 2, 3, 4, 5];
let zeros = vec![0; 10]; // Creates a vector with 10 zeros
let empty: Vec<i32> = vec![]; // Empty vector with explicit type
panic! and assert!
For error handling and debugging:
fn divide(a: i32, b: i32) -> i32 {
    if b == 0 {
        panic!("Division by zero!");
    }
    a / b
}

fn test_function() {
    assert!(2 + 2 == 4);
    assert_eq!(divide(10, 2), 5);
    assert_ne!(divide(10, 3), 4);
}
Creating Your Own Function-like Macros
You can create custom macros using macro_rules!. The syntax uses pattern matching to handle different input formats:
macro_rules! say_hello {
    // Pattern 1: No arguments - () means empty input
    () => {
        println!("Hello from a macro!");
    };
    // Pattern 2: One argument - $name:expr captures any expression
    ($name:expr) => {
        println!("Hello, {}!", $name);
    };
    // Pattern 3: Two arguments - comma-separated expressions
    ($name:expr, $age:expr) => {
        println!("Hello, {}! You are {} years old.", $name, $age);
    };
}

fn main() {
    say_hello!();                    // Matches pattern 1
    say_hello!("Alice");             // Matches pattern 2
    say_hello!("Bob", 25);           // Matches pattern 3
}
Key syntax elements:
$name:expr- Captures an expression and names it$name$name- Uses the captured value;- Separates different pattern rules=>- Separates pattern from generated code
Generating code at Compile-time with Function-like Macros
Macros can create entire functions, structs, or other code:
macro_rules! create_function {
    // $func_name:ident captures an identifier (function name)
    ($func_name:ident) => {
        fn $func_name() {
            // stringify! converts the identifier to a string
            println!("You called {:?}()", stringify!($func_name));
        }
    };
}

// These create actual functions at compile time
create_function!(foo);
create_function!(bar);

fn main() {
    foo(); // Prints: "You called \"foo\"()"
    bar(); // Prints: "You called \"bar\"()"
}
Macros vs Functions: When to Use Which
| Macros | Functions |
|---|---|
| Generate code at compile time | Execute at runtime |
| Can take different types of input | Fixed parameter types |
| No runtime overhead | Standard function call overhead |
| Can violate some syntax rules | Must follow all syntax rules |
| Harder to debug | Easier to debug |
| Can accept variable number of arguments | Fixed number of parameters |
Use macros when you need:
- Code generation
- Compile-time computation
- Variable number of arguments with different types
- Domain-specific languages within Rust
Use functions for regular computation and logic.
Best Practices for Rust Syntax.
Syntax Best Practices:
- Embrace explicitness: Rust's verbose syntax prevents bugs
- Use
matchextensively: It's more powerful than if-else chains - Leverage the type system: Let the compiler catch errors
- Don't fight the borrow checker: Work with ownership, not against it
Common pitfalls of Macros and how to avoid them
- Macro Hygiene Issues
// Problematic: variable name collision
macro_rules! bad_macro {
    () => {
        let x = 5;// This 'x' might conflict with user code
    };
}

// Better: use unique identifiers or proper scoping
macro_rules! good_macro {
    () => {
        {
            let _internal_x = 5;
// ... use _internal_x
        }
    };
}- Overusing Macros
Remember: just because you can use a macro doesn't mean you should. Functions are often clearer and easier to maintain. Some development frameworks however have built-in macros that are required in the code, it is advisable to follow the standards of the framework you are using.
- Forgetting Macro Visibility
Macros need explicit export to be used in other modules:
#[macro_export]
macro_rules! my_macro {
    () => {
        println!("Available everywhere!");
    };
}
Real-world Applications: Rust in Solana Development
Development with Solana heavily relies on Rust and uses a lot of macros through the Anchor framework. Here's how the concepts we've discussed appear in real Solana programs:
use anchor_lang::prelude::*;

// This macro generates the program ID validation code
declare_id!("53hgft52DHUKMPHGu1kusuwxFGk2T8qngwSw2SyGRNrX");

// #[program] is an attribute macro that transforms this module into a Solana program with proper entry points
#[program]
pub mod my_solana_program {
    use super::*;

    pub fn initialize(ctx: Context<Initialize>, name: String, age: u64) -> Result<()> {
        // msg! is a function-like macro for efficient logging
        msg!("Initializing program with user: {}", name);

        // Rust's pattern matching in action
        let status = match age {
            0..=17 => "minor",
            18..=64 => "adult",
            _ => "senior",
        };

        msg!("User status: {}", status);

        // Using Result type for error handling
        if name.is_empty() {
            return Err(ErrorCode::InvalidName.into());
        }

        let user_account = &mut ctx.accounts.user_account;
        user_account.name = name;
        user_account.balance = 0; // Start with 0 tokens
        user_account.created_at = Clock::get()?.unix_timestamp;

        Ok(()) // Success case
    }

    pub fn transfer_tokens(ctx: Context<Transfer>, amount: u64) -> Result<()> {
        let from_account = &mut ctx.accounts.from;
        let to_account = &mut ctx.accounts.to;

        // Rust's ownership system prevents data races
        if from_account.balance < amount {
            return Err(ErrorCode::InsufficientFunds.into());
        }

        from_account.balance -= amount;
        to_account.balance += amount;

        msg!("Transferred {} tokens", amount);
        Ok(())
    }
}

// #[derive(Accounts)] is a procedural macro that generates account validation and deserialization code
#[derive(Accounts)]
pub struct Initialize {
    #[account(init, payer = user, space = 8 + 64)]
    pub user_account: Account<'info, UserAccount>,
    #[account(mut)]
    pub user: Signer<'info>,
    pub system_program: Program<'info, System>,
}

#[derive(Accounts)]
pub struct Transfer {
    #[account(mut)]
    pub from: Account<'info, UserAccount>,
    #[account(mut)]
    pub to: Account<'info, UserAccount>,
    pub authority: Signer<'info>,
}

// Custom account structure
#[account]
pub struct UserAccount {
    pub name: String,
    pub balance: u64,
    pub created_at: i64,
}

// Custom error types using derive macro
#[error_code]
pub enum ErrorCode {
    #[msg("Name cannot be empty")]
    InvalidName,
    #[msg("Insufficient funds for transfer")]
    InsufficientFunds,
}
This Solana program demonstrates a simple token management system that showcases key Rust concepts in blockchain development.
The initialize function creates new user accounts by storing their name, setting an initial balance of zero tokens, and recording a timestamp, while using Rust's pattern matching to categorize users by age and Result types for error handling. The transfer_tokens function enables secure token transfers between accounts by checking sufficient funds and updating balances, demonstrating Rust's ownership system that prevents data races.
The code heavily relies on Anchor framework macros like msg!() for logging, #[derive(Accounts)] for account validation, and #[account] for data serialization, showing how macros eliminate boilerplate code while maintaining the safety and performance that make Rust ideal for blockchain development.
Key Rust concepts in this Solana code:
- Function-like macros:
msg!()- Generates efficient logging code for Solana programsdeclare_id!()- Embeds and validates the program's unique identifier
- Attribute macros:
#[program]- Transforms the module into a Solana program entry point#[derive(Accounts)]- Auto-generates account validation logic#[account]- Creates serializable account structures#[error_code]- Generates error handling boilerplate
- Rust patterns we learned:
- Pattern matching with
matchfor age categorization - Result types with
Ok(())andErr()for error handling - The
?operator for error propagation in account access - Ownership and borrowing with
&mutfor safe account mutations - Structs for organizing account data and function parameters
- Pattern matching with
- Why macros matter here:
- Performance:
msg!()compiles to efficient Solana loggingsyscalls - Safety:
#[derive(Accounts)]generates validation code that prevents common security bugs - Ergonomics: These macros eliminate hundreds of lines of boilerplate code
- Performance:
The code above show how Rust's safety features and macro system make Solana development both secure and productive. The ownership system prevents data races in concurrent blockchain environments, while macros handle the complex serialization and validation logic that every Solana program needs.
Rust's unusual syntax and powerful macro system might seem intimidating initially, but it serves important purposes such as: safety, performance, and expressiveness. The ownership system prevents entire classes of bugs, pattern matching makes code more robust, and macros enable powerful abstractions without runtime cost.
Some jargon explanations:
- "garbage-collected languages" → "garbage-collected languages (languages that automatically manage memory)"
- "null pointer dereferences" → "null pointer dereferences (accessing memory that doesn't exist)"
- "compile time" → "compile time (when your code is being built, before it runs)"
- "syscalls" → "syscalls (system calls - direct requests to the operating system)"
Next Steps
- Practice ownership patterns: Write small programs focusing on borrowing and lifetimes
- Learn how structs work and how to use them
- Experiment with macros: Start with simple
println!variations and work up to custom macros - Read real Rust code: Explore popular crates to see how experienced developers use these features.
- Build something: Nothing beats hands-on experience with a real project and we will be doing a lot of that in this course definitely.